Intro
This step-by-step blog is for newbies, based on a question launched in the forum yesterday, look at the thread:
https://forums.adobe.com/thread/2586794
Goal: to have automatically images instead of the default failure message in a Software Simulation, Training mode. Don’t fear: I will not use any variables nor shared/advanced actions. It is a very simple workflow, provided to use it before recording! It is a lot more complicated if you want to achieve this after recording.
Default setup in all Themes
Feedback messages exist not only in Training/Assessment Simulations where they are linked to a Click box or a Text Entry Box, both interactive objects. You also have them for Interactive objects in normal, non-sim projects. In the default setup this is a bit confusing to newbies for these reasons:
- Feedback messages can be captions or shapes (both are text containers). Success, Failure, Hint messages have no individual timeline, they appear automatically, are linked to the interactive object: click box, button, Text Entry box
- In the default setup, the choice is to have Shapes, not Captions. You see this under Preferences, Defaults. You can change that preference by checking this box (SFH stands for Success, Failure, Hint):

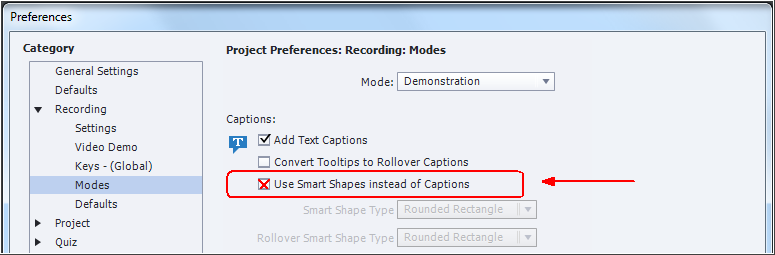
- However this is NOT the default setup for those messages in Software simulations where Captions are the default. To change to Shapes, you need to check this box under Recording, Modes:
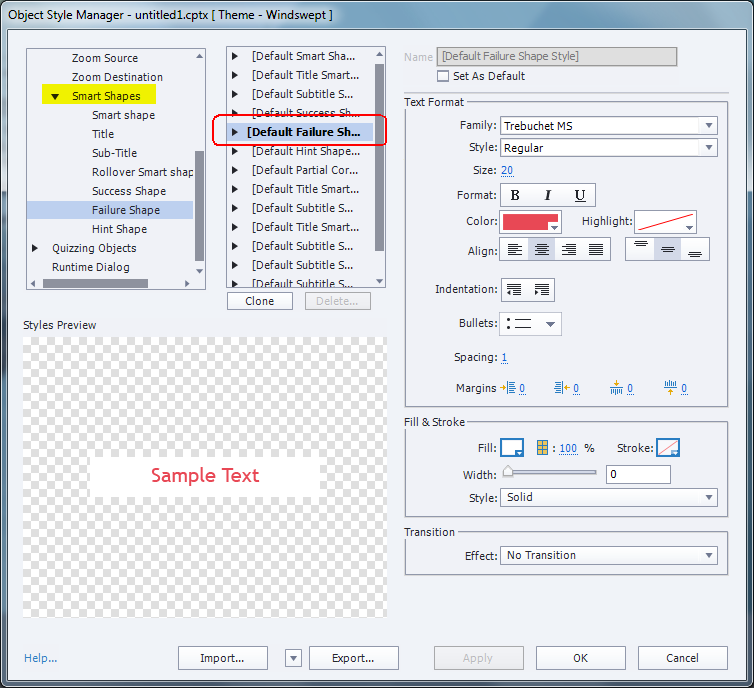
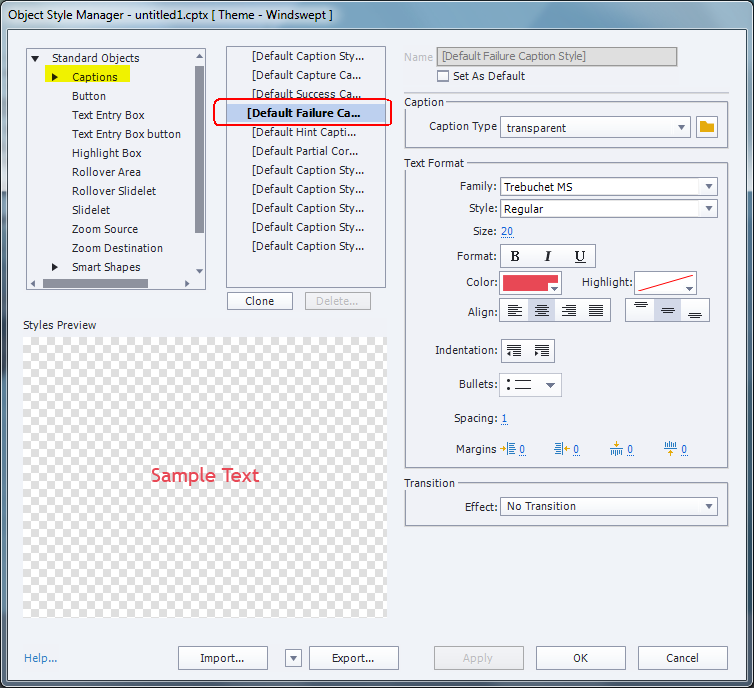
- Both types of text containers, Shapes and Captions do use a dedicated, default style. There is one style for Success, another for Failure and one for Hint message. You can check all of them out in the Object Style Manager (menu Edit, or SHIFT-F7). As all styles, these are part of the used Theme. FYI: I used the Windswept theme packaged with CP2019. Here are two examples: one for a Failure message in a Shape, another for a Failure message in a Caption.
- If you use the same type of text container for both normal projects and software simulations by changing checking either the checkbox in Preferences, Defaults to switch to captions, or the one in Recording, Modes to switch to Shapes for sims, in the default setup you will use the same style for all messages of that type. This may not necessarily be what you want, as is the case for the original issue here: only the Failure feedback message for the software simulation slides have to be ‘converted’ to images, not those for non-sim slides.
Step-by-step
1 Switch to Shapes for Simulation feedback
Open Preferences, Recording and choose Modes.
Check off the option ‘Show Smart Shapes instead of Captions’.
2 Create shape filled with Image
2.1 Import Image in Library, check Size
Import the image you want to use to the Library using the second button:
It will be in the Images folder, you can use JPEG or PNG (eventually GIF). Open its Properties with the right-click menu on its name and take note of the size:
2.2 Create a shape with that size
Create a (rectangular) shape with exactly the same size, using its Options tab (or eventually a grid created with guides);
That shape will automatically take on the Default shape style, in this case it is filled with a Solid color, grey, from the Theme Colors.
2.3 Fill the shape with the image
With shape still selected, switch back to the Style tab in the Properties. Open the dropdown list under Fill, and choose Image instead of Solid. The default texture will now fill the shape.
Click the Image button to open the dialog box in this screenshot. You’ll see the folder Images from the Library and can choose your image, confirm with OK:
2.4 Edit Character features
Although the feedback now looks like an image, the text defined in the rdl file for recording feedbacks (too bad that it is not available in Preferences like the Quiz feedbacks) will appear anyway. For that reason you have to set up margins to force that text in the correct position by changing margins font size etc…
If you want to be able to add text in the shape, you can style that text (font, size, color) in the Character part, under the Style tab. For this particular image the challenge was setting up the alignment. I used the maximum number for the left margin (100), which was not sufficient. I had to add twice the Increase Indent as well. In this case I supposed the feedback text would be edited in each slide. If you just want to keep the default feedback text which is (in English) ‘Incorrect, please try again.’ I would increase the font size, and probably also the bottom and right margins.
3 Create custom style
At this moment the field Style still shows ‘Default Smart Shape Style’, but preceded by a + sign. This sign means that the style has been overridden, which is a situation you have to avoid whenever possible. You will create a new custom style, using the tiny hamburger menu in the top right of the Style part. In that menu choose ‘Create new style’ and give that style a meaningful name. I labeled it ‘MyFailureShape’:
You don’t need the shape anymore now, you could delete it.
4 Set custom style to be used for Failure feedback
Open Preferences, Recording and go to Defaults. The Recording defaults dialog box opens. Those defaults are also part of the Theme, it is not necessary to change anything in the Object Style Manager. Find the feedback message where you want to change the style, in this case the Failure Shape style and choose the custom style from point 3.
Recording
Now you are all set. Start the recording, the Failure feedback will have your image style. However the size of the feedback will be automatically be rescaled to fit the size of the feedback text. You will have to check each slide and have to resize the shapes. AFAIK there is no way to keep a fixed size for any feedback message which would have been very useful for this use case. Will certainly log a feature request. Have a look at a failure message as it was inserted:
You could of course also use the same workflow for the Hint and Success feedback messages. If you want to use those feedback styles in other projects, the easiest way is to save the theme and to apply it to other projects. As explained in this blog, both object styles and Recording defaults are part of the theme (Master slides and Skin are the other components).